

To adjust a standard door closer, turn the backcheck, sweep, and latch valves clockwise to slow the door down or counterclockwise to speed it up. Most closers need this done in six steps, from removing the cover to testing the final swing.
Types of Door Closer Adjustments
An automatic door closer runs on hydraulic pressure controlled by a set of small valves. Most standard closers give you three of these, and understanding what each one does makes the rest of this guide much easier to follow.
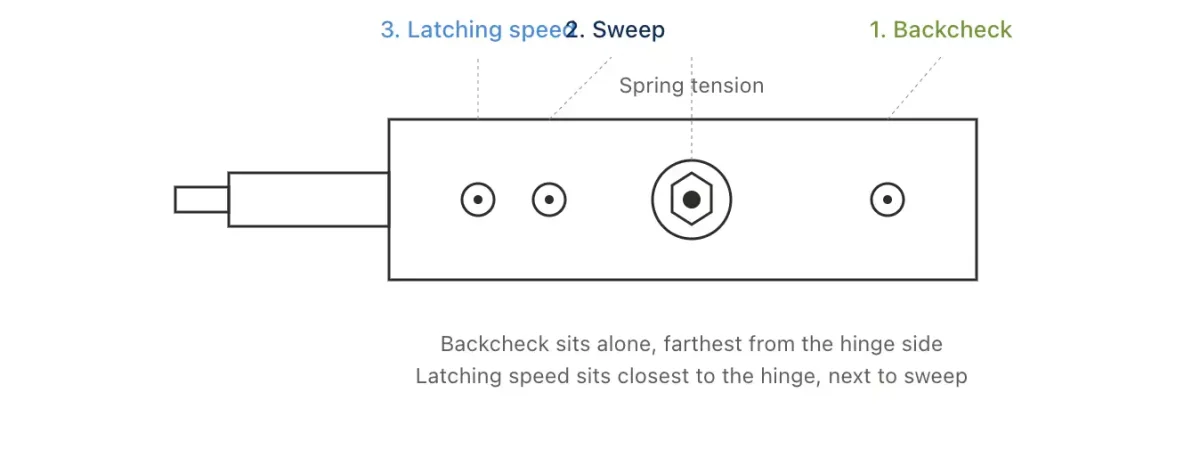
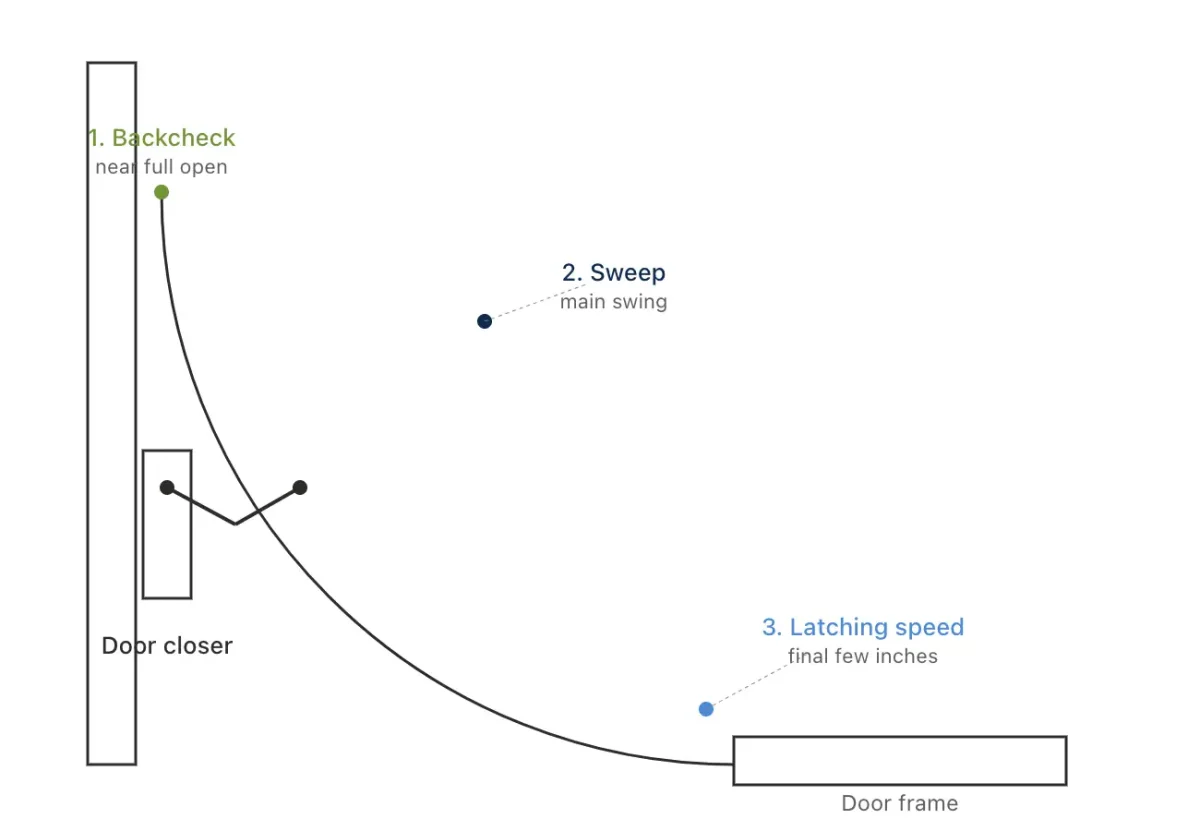
- Backcheck. Slows the door down partway through opening so it doesn’t slam into a wall or get caught by wind. This is usually the valve sitting alone, facing away from the hinge.
- Sweep. Controls the main closing motion, from full open down to about 12 degrees before the door latches. It’s usaully the valve in the middle.
- Latch speed. Governs the final few inches of the swing, right as the door reaches the frame. It’s usually the valve closest to the hinge, next to the sweep valve.
A quick door closer adjustment diagram helps here, since the valve positions vary slightly by manufacturer but usually follow this layout.
Whether you’re doing a front door closer adjustment on a retail entrance or working on an interior office door, the process below is the same across nearly all standard hydraulic closers.
6 Steps for Adjusting a Door Closer
Here are the steps you need to take:
Step 1: Remove the Cover
If you can’t see the valves, the closer has a cosmetic cover over them. If it’s held on with screws, loosen those and slide the cover off. If there are no screws, the cover is just held by tension and pulls straight off.
Step 2: Close All Three Valves
Turn each valve clockwise until it stops. This gives you a consistent starting point before you begin adjusting.
Step 3: Adjust the Backcheck
A door closer adjustment backcheck starts with backing that valve out 1.25 to 1.5 turns counterclockwise. Open the door and check that it slows down around 75 degrees instead of continuing to swing freely. Turning the valve further counterclockwise lets the door open wider before the cushioning kicks in.
Step 4: Adjust the Sweep
Back the sweep valve out 1.5 to 2 turns counterclockwise. This is your main closing speed. Some models need a door closer adjustment allen key for this step instead of a flathead, so check which tool your manufacturer specifies. Turning the valve clockwise slows the swing down further.
Here’s how the arc breaks down across this step and the next one.
Step 5: Adjust the Latch Speed
A door closer adjustment latch speed setting starts the same way: back the valve out 1.5 to 2 turns counterclockwise. The right setting depends on the door. Exterior doors usually want a slightly faster latch speed so the door seals against wind and weather. Interior office doors usually want it slower, so the door doesn’t slam.
Step 6: Test the Door
Open and close the door a few times and adjust from there. Small changes matter here, even an eighth of a turn can shift how the door feels. Clockwise slows things down, counterclockwise speeds them up.
When to Stop Adjusting
Sometimes a door closer adjustment screw 1 and 2 combination won’t budge the swing speed no matter how far you turn it. That’s usually a sign the internal seals have failed and fluid is bypassing the piston instead of controlling it. If you find oil anywhere on the housing or the body itself, don’t keep adjusting, a blown unit needs to be replaced, not turned further.
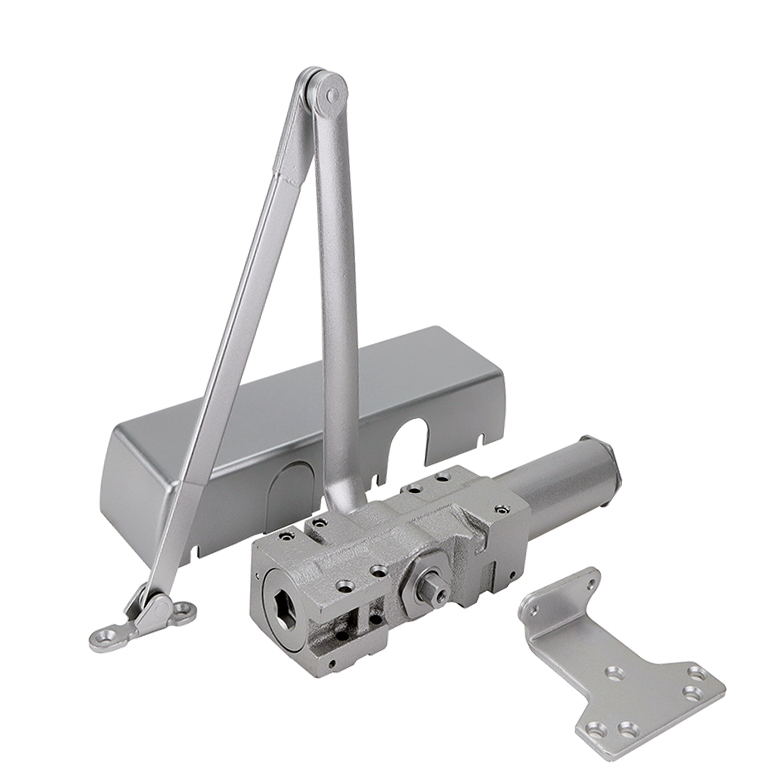
If your current closer keeps drifting out of setting no matter how carefully you dial it in, it might be worth stepping up to a heavy duty commercial door closer built for repeat adjustment, like the OUBAO OB03, which holds its calibration longer under constant daily use.
- Closing ForceEN 1-6 or 8
- Applicable Door Weight15kg-150kg or 150kg-220kg
- Applicable Door Width750mm-1400mm or ≥ 1400mm
Keeping It Trouble-Free
Cold weather thickens hydraulic fluid, which naturally slows a door down in winter. You may need to loosen the valves slightly in colder months and tighten them back up when it warms up.
Never force a valve past its stopping point. Doing so can strip the threads or snap the needle inside, and once that happens, no adjustment will hold. Don’t back a valve all the way out past the body of the closer either, that releases the pressurized fluid entirely and ruins the unit.
Most drift and noise problems trace back to one of these three valves rather than a mechanical fault, so work through all six steps before assuming the worst.